Azure Policy for AKS

Microsoft recently announced that pod security policy has been deprecated in favour of Azure Policy for AKS. As a result you’ll have to transition to Azure Policy for AKS and disable pod security policy by October 15th, 2020. If you don’t disable the pod security policy feature you’ll be unable to perform cluster upgrades and will lose Azure support, however given the feature is in preview this really isn’t a big deal.
With that in mind, what is Azure Policy for AKS and how does it work? The name pretty much says it all, it allows you to apply controls to, and audit the pods running in your AKS cluster using the familiar Azure Policy constructs of definitions and initiatives. This is implemented using the Gatekeeper admission controller.
Enabling Azure Policy for AKS
Azure Policy for AKS is an add-on that can be enabled using the az CLI, through the Azure Portal, or with Terraform. Prior to enabling the add-on the following pre-requisites must be satisfied:
- Your AKS cluster must be running version 1.15 or later.
- If you’re going to enable the add-on using
azCLI the aks-preview extension must be installed and must be version 0.4.53 or later.
The AKS-AzurePolicyAutoApprove preview feature must be enabled. This can be done using the az feature register command.
az feature register --namespace Microsoft.ContainerService --name AKS-AzurePolicyAutoApprove
# After registering the feature you'll need to run the following to propogate the change.
az provider register -n Microsoft.ContainerService
The Microsoft.ContainerService and Microsoft.PolicyInsights resource providers must be registered. This can be done using the az provider registercommand.
az provider register --namespace Microsoft.ContainerService
az provider register --namespace Microsoft.PolicyInsights
Once these pre-requisites are met you can enable the add-on using any of the methods below.
Terraform
Add the following addon_profile block to your azurerm_kubernetes_cluster resource. If you have other add-ons enabled and already have an addon_profile block then simply add the azure_policyblock to it.
addon_profile {
  azure_policy {
    enabled = true
  }
}
AZ CLI
Simply execute the following command replacing democluster with your cluster name and aks-demo with the resource group your cluster belongs to.
az aks enable-addons \
--addons azure-policy \
--name democluster \
--resource-group aks-demo
Azure Portal
- Navigate to your AKS cluster in the portal.
- Click on Policies (Preview).
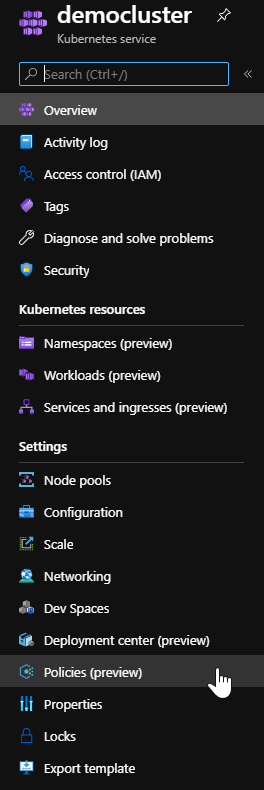
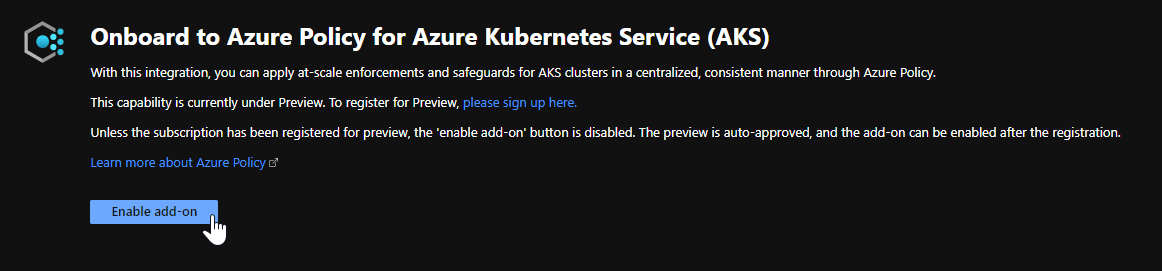
- Click on Enable add-on
Policies
By default, Azure Policy for AKS comes with two initiatives - baseline and restricted. These initiatives are the quickest way to start applying some controls to your pods. The table below summarises the controls applied with each initiative.
Of course, you are likely to want to develop an initiative that makes more sense for your use case. This may be to satisfy organisational policies, compliance frameworks, or security requirements. You can do this by reviewing the full list of available policy definitions and combining them in to an initiative. Instructions for creating Azure Policy initiatives can be found here.
Demo
To demonstrate Azure Policy for AKS I’m going to enable the add-on in a demo cluster, apply the baseline initiative, and then attempt to create a privileged container.
Enable the Add-On
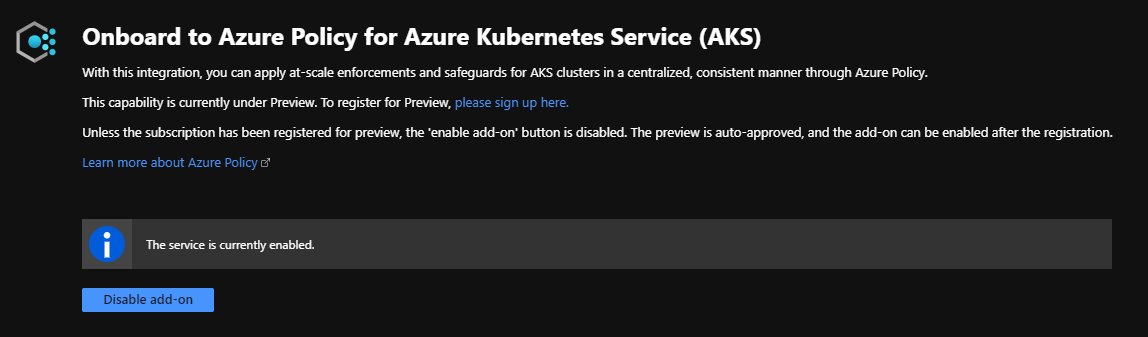
The steps to enable the Azure Policy for AKS add-on are outlined at the start of this post, so I won’t repeat them here. Instead I’ll show you how to confirm that the add-on has been enabled for your cluster. The first thing to check is the Policies (preview) section of the AKS menu in the Azure portal which will look like this if the add-on is enabled:
You’ll also notice a few new pods running in your cluster for Gatekeeper and Azure Policy:


Apply the baseline policy
- Head to Azure Policy in the Azure Portal.
- Click on Assign Initiative.
- Set your scope to either the entire subscription or a resource group containing your policy-enabled AKS cluster.
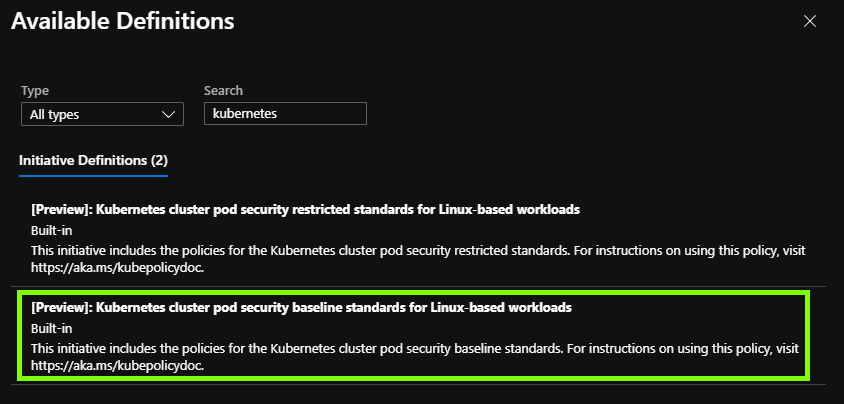
- Open the initiative declaration search by clicking on the ellipsis button next to the Initiative definition box. Search for “kubernetes” to find the AKS policy initiatives and select the baseline initiative.
- Open the Parameters tab and set the effect to “deny”. This will prevent a pod being deployed in in the event that it does not comply with policy, rather than only being audited.
- Click on Review + Create to create the assignment.
Test a control
To confirm that the policies are being enforced, I’m going to attempt to create a privileged container. Referring to the table above you’ll notice that this is one of the controls implemented by the baseline policy. This is the manifest we are going to deploy:
apiVersion: v1
kind: Pod
metadata:
  name: alpine-privileged
spec:
  containers:
    - name: alpine-privileged
      image: alpine
      securityContext:
        privileged: true
Below is the error message given after attempting to deploy the privileged container, clearly showing that the deployment was denied by policy. Note that this gives immediate, clear feedback which is important in enabling developers to quickly identify and resolve the reason their pod is being denied.

If we then remove the privileged security context from the pod so that our manifest now looks like this:
apiVersion: v1
kind: Pod
metadata:
  name: alpine-standard
spec:
  containers:
    - name: alpine-standard
      image: alpine
We see that the pod is successfully deployed as expected as it complies with our policies.
